I'm starting a new feature here at Cute Junk called One & Done. Any projects listed under that tag will take less than an hour to complete. If you're looking for a quick crafting fix, that's the tag for you! No promises on how many of these I'll upload but it's on my radar now!
Ok, so Dude's boyfriend Dizzy, (seriously, Dude had to upgrade his cell phone plan to accommodate all the talking they were doing) is getting married next week. Dude is the best man; and this is the second-to-last of Dude's boyfriends to tie the knot; and even though the wedding is in town, we got a hotel room so we can both drink! So this wedding is kind of big deal.
I knew I wanted to make them a special card since I used up my "You Can't Say Happiness Without Penis" card awhile ago. I saw this super cute card in Pinterest and decided to recreate it with my own spin.
Let's get the obvious out of the way. My dang card is backwards; and let's be honest, the dots along the bottom are so wonky, I should tell Dizzy and Danielle I was drunk when I made it to save myself the embarrassment of saying that was done under no influence at all.
Glad that's out of the way. Don't worry, I'll tell you how to make the card so yours isn't backwards.
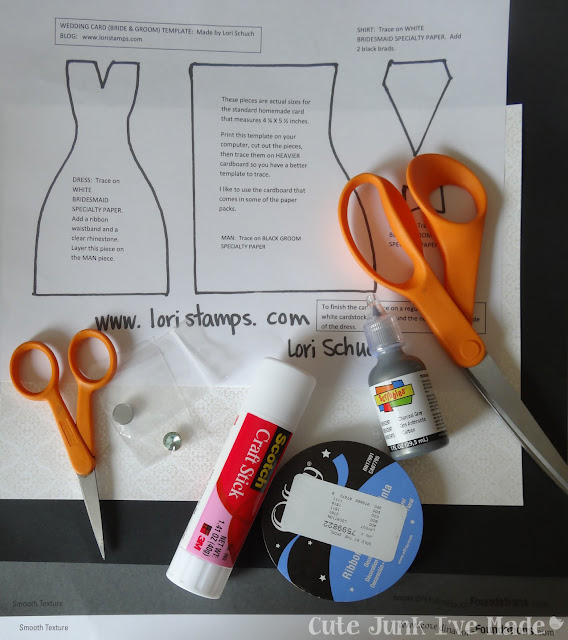
Ok, grab your stuff:
- Wedding Card Template from Lori Stamps
- Scissors (a paper cutter with a scoring blade would also be helpful_
- Glue stick
- 3 pieces of scrapbook paper - one white fancy one, one plain black one, and one piece in a color of your choosing - it's for the bowtie. Alternatively, you could use the black
- One piece of white cardstock
- Embellishments - I used a piece of grey ribbon and grey craft paint that matched the paper I picked out for the bowtie.
Ok first, cut out the pieces of the template.
I wanted to have my dress strapless, so if you like the straps, keep the template the way it is and skip to the next step.
I'm a complete idiot when it comes to drawing, so I cut out the dress from the template, then lined it up over top of a white piece of copy paper to get my proportions right. Then I cut the top of the dress off at the waist and drew a half heart-looking thing where the straps used to be.
If you made a new dress stencil, cut it out. Now we're up to speed with the rest of the class.
Line your stencil up on your fancy white paper, trace it and cut it out.
Then grab the weirdly shaped stencil piece and trace it onto the FRONT of your black scrapbook paper. If you line it up on the back like you were taught in elementary school, your whole flipping card will be backwards; and if you're clueless you won't notice until the end and then be too irritated to start it all over.
 |
| Stupid tracing on the back of the paper... |
 |
| If you did this right, your swoopy side will be on the right, NOT the left |
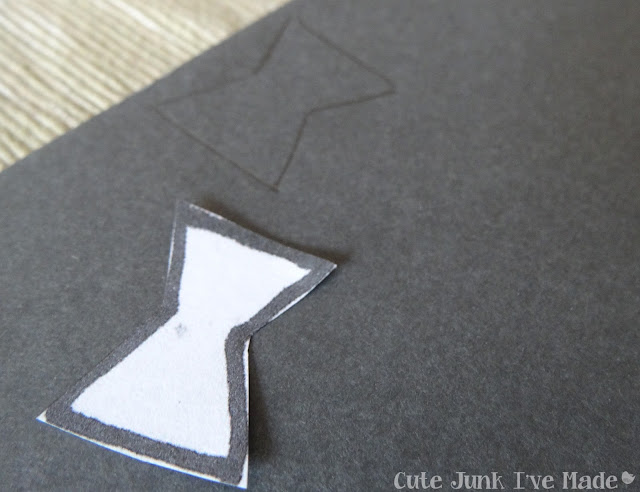
Next, trace the diamond-shaped stencil onto your white cardstock. Cut out the white diamond piece and glue it to the black paper. I glued mine maybe a half-inch higher than the top of the dress, but do what makes you happy.
Copy the bowtie stencil onto whatever paper you're using. In my case, I traced it onto the grey paper I bought.
I put the tie on the diamond-shaped piece and thought it looked like it was missing something.
So I freehanded a little scrap to wrap around the middle of the bowtie.
I don't know what a bowtie looks like in real life, I'm just guessing there would be a little piece that wraps around the middle.
 |
| Much better! What is that weird turd-looking thing on the dress?? |
I thought it was still missing a little something, so I scrounged through my scrapbook paper stash and found some cute flowers on a scrap piece and cut those out.
When your "bride and groom" are properly embellished, all that's left is to glue them onto a card. You can buy blank cards at just about any craft store, or make one out of your leftover white cardstock. I'm impatient and didn't want to run out for a blank card, so I made one out of the leftover cardstock.
Right about here is where I realized the whole dang card is backwards. But, even backwards it's pretty cute, especially since it took me probably 35 minutes from start to finish to complete.
Background Noise for this Project: Buffy the Vampire Slayer (TV) - Season 1, Episode 4: Teacher's Pet


No comments:
Post a Comment
Sorry for the word verification, but spammers are driving me nuts!!