You’re going to think I’m a bad dog parent when I say this,
but we adopted Zeke in May and last night was the first night he slept in his
own bed…
The thing is, when we first got Pepper, we bought her this
amazing luxurious dog bed that cost somewhere just shy of “insanely expensive”
and right around “Are you kidding me? The sheets on my bed cost less
than that!” We took it home; she slept
in it for maybe 3 nights before shredding it one morning before we got up.
So after that incident, we never bought her another bed and
poor Zeke has just been sleeping on the floor since we brought him home. I don’t think he minds it, but I know his hips
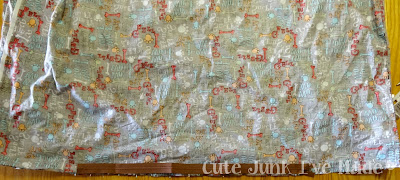
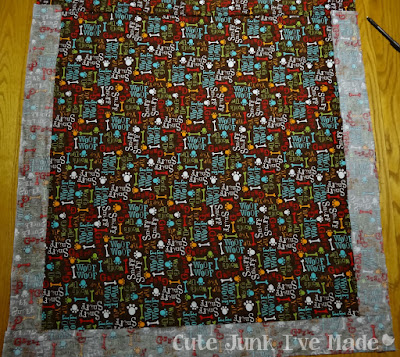
bother him in the morning so when I saw this super cute fabric on sale at
JoAnn’s I figured it was time to make one.
This project was so simple; I was able to take it from start
to finish in less than two hours.
First things first, you’re going to need some supplies:
- 3 yards of fabric*
- Matching thread
- A zipper or some kind of closure (snaps, Velcro, buttons, etc.)
- Rotary cutter and cutting mat or scissors
- Padding to go inside the bed. I was able to reuse some memory foam padding we were no longer using on our bed
- The usual sewing crap - pins, needles, tape measure n'at
*A note on fabric – Zeke is a big dog and I wanted to give
him space to spread out. If you’ve got a
teacup Yorkie, you aren’t going to need three yards of fabric unless you’re
making 15 beds, so adjust accordingly.
**A note on 98% of the pictures in this tutorial – they were
taken in my basement, under a fluorescent light, mostly late at night, so sorry
they are so yellow.
***A note on all the notes – I promise I won’t make this a
habit.
The first thing you want to do is measure your padding.
My padding is roughly 39”x39” and 2.5” thick. Add an inch to each measurement and now you’ve
got the length, width and height for your fabric.
Cut two 40”x40” pieces of fabric. These two will be the top and bottom of the
bed.
Then cut four 3.5” x 40” pieces of fabric. These four pieces will make up the sides.
Lay out one of the 40”x40” pieces right side up and pin one
of the side pieces to the top, right sides together.
Sew the up the length (long side) of the fabric with a ½” – ¾” seam
allowance.
If you have a serger or if you’re a perfectionist, finish
the edges, but to be totally honest, I didn’t.
I don’t have a serger and a zigzag stitch takes way too freaking long. Zeke told me he didn’t care if his new bed
had raw edges on the inside. I may come
to regret listening to him the first time I wash this bad boy though.
Pin and sew the remaining three sides to the top of the bed. Again, serge or finish the raw edges with a
zigzag stitch but don’t feel like you have to.
Now it’s time to sew the four sides together to create
corners. Working one corner at a time,
pin each side to the one next to it, making sure to keep right sides
together. It will feel and look a little
awkward, but I promise everything will turn out ok.
This is what your bed will look like when you finish sewing
one corner -
Once you’ve sewn up all three corners, it’s time to attach the
bottom of the bed. Flip the bed inside
out again (I know you turned it right side out to admire your corners); and
start pinning the bottom of the bed to the raw edges.
If you measured and cut everything perfectly, the bottom
square should line up in each corner without any problems. If you made a couple of wonky cuts, no
worries, you’ll just need to do some creative folding while you pin.
Sew up three of the four sides just like you did for the
top. At this point, I flipped everything
right side out and did a test run with the padding inside to make sure
everything still fit and my seam allowances weren’t too big.
This is what happened the second I put it on the floor.
 |
| Notice how Pepper is complete chaos and Zeke is an angel |
Now it’s time to close up this thing so your poor pooch can
get some rest! I used a 22” zipper to
close it up, but buttons, snaps or even Velcro could all work here. No matter what, you’re going to want some way
to remove the cover from the padding so you can wash it.
Alright, grab your calculator and tape measure and measure
your zipper end to end.
 |
| Let's call that 23" because I am no good with fractions. |
Subtract the length of your zipper from the total length of
the bed. In my case, 39” minus 23” is 16”. Divide that number by two so you can center
your zipper. In my case, the zipper
needed be 8” from either end.
Place a pin or two going the opposite direction of all your
other pins or make a mark at the spot where you want the zipper to begin and do
the same on the other side where you want the zipper to end.
At this point, I laid out my zipper just to double check my
measurements.
 |
| Looks good! Let's sew! |
Sew a basting stitch in the area you have laid out for your
zipper. Do not sew the entire length of
the bed or you will regret it when you realize your zipper is closed and you
have no way of turning the bed right side out.
This may or may not have happened to me.
Twice.
Once you’ve sewn your basting stitch, iron out the seams so
you have somewhere to put your zipper.
Place your zipper face down on the seam. Do your best to center it along the seam. When your zipper is sewn in, you’re going to
rip out the basting stitch and your zipper will be in its place.
Use a glue stick or pins to secure your zipper and all that’s left now is to sew in your zipper. Don’t be intimidated; and remind yourself that
you can always rip out your stitches and start again. I used this tutorial to guide me when I got stuck.
Which was a lot.
Which is why there are no pictures of this part of the process.
When your zipper is in, go ahead and flip the bed right side out
and use your seam ripper to rip out the basting stitch.
Now pat yourself on the back because putting in zippers sucks,
but you stuck with it and totally kicked that zippers ass.
Flip the bed inside out one last time and sew up the
remaining two open edges. Make sure to
leave the zipper open a little so you can easily turn it right side out when
you’re done.
Put whatever padding you have inside the bed, zip it shut
and you’re done!
 |
| Let's imagine that garden cart full of "landscaping stones" is some kind of clever art piece instead. |
I’ll admit, this was a little more time intensive than just
hopping in the car and buying one at the pet store, but seeing him lounging on
it was totally worth it!
Cost breakdown for this project:
Fabric - $5/yard + 20% off coupon
Zipper - $3
Thread - $2
Padding – FREE, upcycled from our bed
Total Cost: $20 and
change
Dude's niece saw it from the street while Zeke was having his
photo shoot and she said it looked like something you could buy in the
store. And that's why she's awesome!
Background Noise for this Project: Water for Elephants Love me some Christoph Waltz!


No comments:
Post a Comment
Sorry for the word verification, but spammers are driving me nuts!!