Showing posts with label cute diy. Show all posts

Monday, April 22, 2013

Unisex Chevron Baby Shower + FREE Printables!

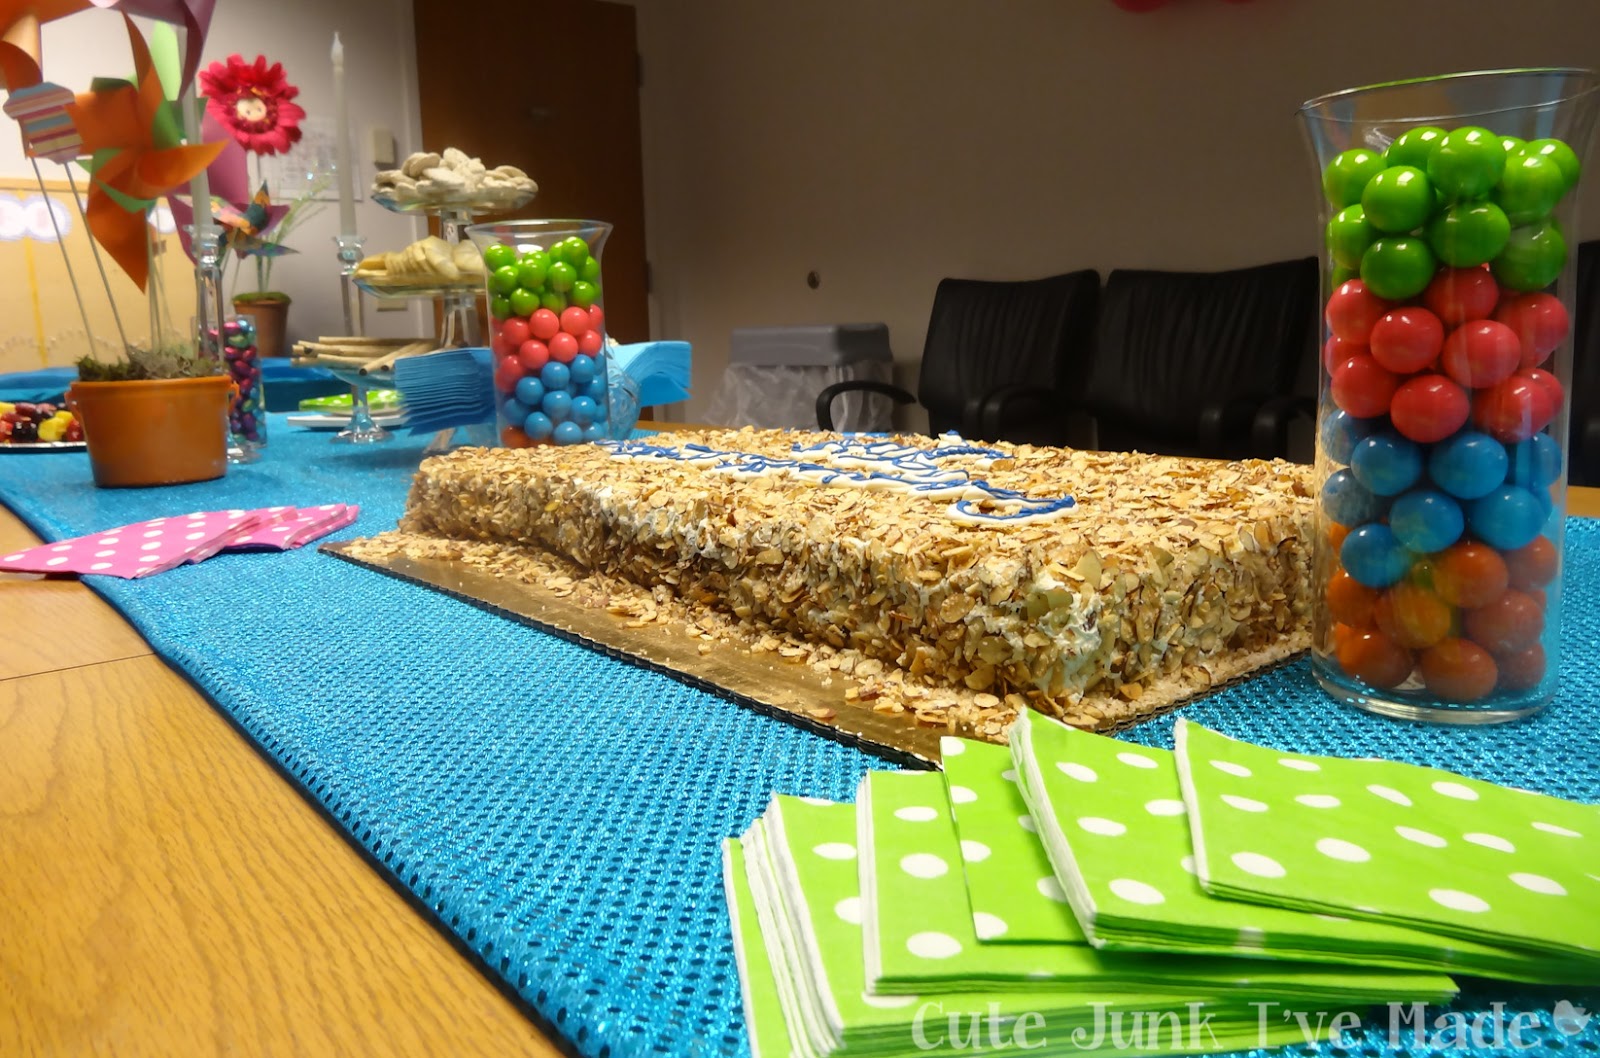
My favorite part of my day job is that I'm in charge of planning parties and events for the floor.  So what that means, essentially, is that I get paid to browse Pinterest for ideas, decorate, and all of my supplies are paid for!

One of my favorite people on the floor is having her first child next month - let's call her MTB - so when her supervisor asked me to help plan a shower I was stoked!

She is not your typical baby animals, pastel pink and blue, cutesy type of mom-to-be, so I knew a standard baby shower wasn't going to work for her.  I'm sure she would have appreciated anything we did, but we wanted it to scream her name when you walked in the door.


When she was telling me about her neutral with pops of color nursery, inspiration was born!

These are the colors I chose for the shower.


 And the invite.

Font, Font


And then I whipped up a little baby shower banner.  Download your own here!


Some bright-colored tassles.

Tutorial


Some big and bright poofs.


Tutorial

And PINWHEELS!  I'll detail in another post how I made these.


My co-conspirator, Joanie, brought/made these super cute Kewpie flowers.


Did I mention MTB isn't finding out what she's having?  And since no shower is complete without a game of sorts, I used that and came up with this "Bow or Beau" bulletin board game.  Since you guys are my favorite people on earth, I'm also sharing the headers for the bulletin board with you here.


Looks like she's having a boy!

Here's the decorated conference room.  It goes to show even the dingiest office conference room can be a great setting for a party!


Check out those artfully arranged forks!  That is all Joanie!

Get it?  An umbrella for a shower??  Get it!!


All in all, it was a fun time and we had a blast decorating for this shower!  If you use the printable baby shower banner or the printable Bow or Beau game, I'd love to see them in action!

If you'd like a blank version of the invite to customize yourself, I'd be happy pass it along, just email me!

Linking up, where else?
Photobucket

Tuesday, March 26, 2013

Simple Spring Wreath + FREE Printable!


Truth time:  I just took down the Christmas wreath from my front door last weekend. 

In my defense, it was just green and snowy and had pinecones all over it so it wasn’t exactly “Christmas-y.” 

But still.  I started to feel like our mailman was judging my decorating abilities ever since my “Let It Snow” banner stayed up until it was literally falling apart.

Seriously, I found one of the letters in my neighbor’s yard.

Anyways, so I dug through my craft stash closet in out attic looking for something bright and springy and found this.

Source

Ok, not exactly this one but a grape vine wreath I bought I think last spring.  Who knows what project I was planning that never got started...

Anyways, I found the wreath and the wheels started churning.  I was thinking bright colors, maybe some rosettes and definitely the word “SPRING” somewhere. 

So late last week I made this cute little spring banner. 


Then I strung it up on some twine, using the handy-dandy tabs at the top.  I made these tabs primarily because I can’t find my stupid hole punch.  Feel free to cut them off if you prefer to punch holes instead. 


Then I made some rosettes out of scrapbook paper and leftover fabric and hot glued them on.  I won't tell you how I made them because there are better tutorials than I could ever give all over the interwebs.  But if you need some help, check these out:    


Finally, I added a little band along the left-hand side for color.  I liked it when I put it on, but looking at the pictures now, I may take it off.  


And there you have it!  Super simple, quick and easy spring wreath.


If you’d like to make your own, grab a copy of my printable spring banner here.  There is a large version and a small version.  The small is good for a wreath like mine, the large is good for hanging in a small window or at work.

Have fun and happy crafting!


Background music for this project:  Buffy the Vampire Slayer – Season 7, Episode 8: Sleeper 

As usual, linking up to my favorite linky parties!
Lil’ Mrs. Tori

Monday, December 17, 2012

FREE Printable Let It Snow Banner!

Free Printable Let It Snow Banner - TItle Picture

What bugs me the most about holiday decorating is that January gets kind of jipped.  Sure January gets New Years Day, but that's about it.  Once your holiday decorations come down, it's all about Valentines Day.

So, the other day I was putzing around on Brusheezy, and came across these super cute snowflake brushes and inspiration for this Let It Snow Banner struck.  And I figured while I was making a cute banner for myself, I should get in the Christmas spirit and share it with you guys too!

Free Printable Let It Snow Banner 

I've got a tutorial below on how I put it together; but don't feel pressured to stick with the colors I picked!  This would be super cute with a burlap background or strung on rustic or bakers twine.  Or if you have some glitter laying around, you could glitterize the letters.  Or if you hate blue fuzzy mittens, you could ditch them.  Maybe I should re-make this banner for myself with all my other ideas...

So if you're following along at home, here's what you'll need.

Let It Snow Banner - Supplies

  • Cute Junk I've Made Let It Snow Banner, printed
  • Hole punch
  • Rounded corner punch (best $5 I've EVER spent!)
  • Any version of your favorite paper adhesive - I used a glue stick
  • 1 sheet of fancy scrapbook paper for the mittens
  • 3 sheets of color-coordinated plain scrapbook paper
  • Coordinating ribbon
  • I don't even know what to call this - white fur-looking ribbon stuff.  I got 12" from the ribbon section of JoAnn's but you could probably get away with 6"
First, cut the Let It Snow letters apart.

Let It Snow Banner - Cut Out Letters

Then, grab your plain scrapbook paper and cut out twelve 4 1/8" x 5 1/2" rectangles.  You'll be pasting your letters (and snowmen) onto these rectangles to give your banner a little weight and make it a bit more durable.

Let It Snow Banner - Cut Out Backing Rectangles

Paste your letters onto the plain scrapbook paper rectangles.

Let It Snow Banner - Finished Banner Letters

If you have a rounded corner punch, get crazy and punch those pointy corners off your letters.  If you don't have one, don't sweat it.

Let It Snow Banner - Rounding Corners

Now it's time to make some mittens for the beginning and end of the banner.

I free-handed the mitten drawing on my fancy scrapbook paper, but there are eleventy-billion coloring pages and templates online if you're particular.

Let It Snow Banner - Mittens

The mittens look kind of naked, don't they??  Cut your crazy fur-ribbon to fit and glue a piece to the top of each mitten.  

Let It Snow Banner - Furry Mittens


Next, grab your hole punch (lots of punching here) and punch two holes at the top of each letter.  Try to center them as much as you can, but no need to get out your protractor.


When you've got all your holes punched, string your coordinating ribbon through them.

Let It Snow Banner - Ribbon and Letters Strung Together

Let It Snow Banner - Ribbon and Letters Strung Together

Now hang that baby up!!  Since the banner is kind of long, it's helpful to have an extra set of arms to help you hang it up.  Attached to you or someone else, doesn't matter.

First I put it up on my mantle.


But I had to take down our stockings to hang it up and the mittens ended up pretty much inside the dragon tanks on both sides.  Then I thought how flipping cute would it be hanging up on top of my snowflake curtain?!

Let It Snow Banner - Finished Banner with Snowflake Curtain


And there it stayed.  Until I decided to move it out onto our covered front porch so our mailman Dominic could admire it.

No pictures, sorry, it was late!!

Linking up here:
Lil’ Mrs. Tori


Background Noise for This Project:  Duck Dynasty, Season 1 - Episode 10:  Plain Bee

Friday, November 16, 2012

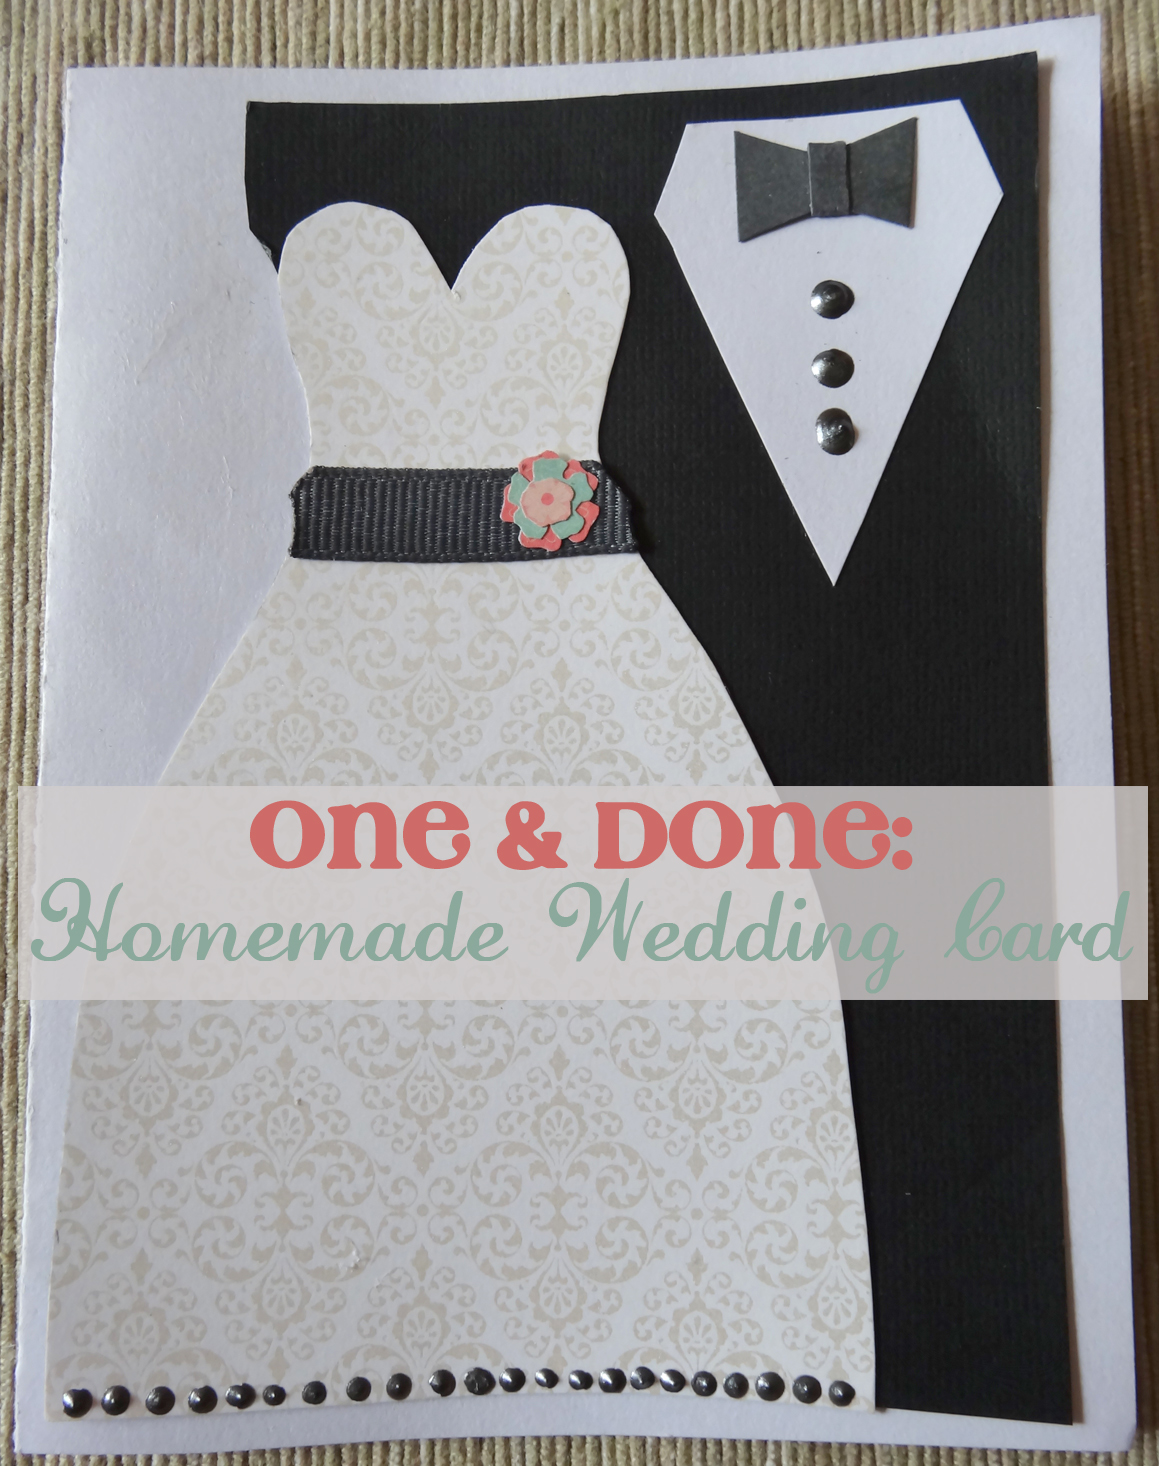
One & Done: Homemade Wedding Card

Cute Junk I've Made:  Homemade Wedding Card

I'm starting a new feature here at Cute Junk called One & Done.  Any projects listed under that tag will take less than an hour to complete.  If you're looking for a quick crafting fix, that's the tag for you!  No promises on how many of these I'll upload but it's on my radar now!

Ok, so Dude's boyfriend Dizzy, (seriously, Dude had to upgrade his cell phone plan to accommodate all the talking they were doing) is getting married next week.  Dude is the best man; and this is the second-to-last of Dude's boyfriends to tie the knot; and even though the wedding is in town, we got a hotel room so we can both drink!  So this wedding is kind of big deal.

I knew I wanted to make them a special card since I used up my "You Can't Say Happiness Without Penis" card awhile ago.  I saw this super cute card in Pinterest and decided to recreate it with my own spin.

Let's get the obvious out of the way.  My dang card is backwards; and let's be honest, the dots along the bottom are so wonky, I should tell Dizzy and Danielle I was drunk when I made it to save myself the embarrassment of saying that was done under no influence at all.

Glad that's out of the way.  Don't worry, I'll tell you how to make the card so yours isn't backwards.

Ok, grab your stuff:
Homemade Wedding Card - scissors, template, ribbon glue stick, puff paint
  • Wedding Card Template from Lori Stamps
  • Scissors (a paper cutter with a scoring blade would also be helpful_
  • Glue stick
  • 3 pieces of scrapbook paper - one white fancy one, one plain black one, and one piece in a color of your choosing - it's for the bowtie.  Alternatively, you could use the black
  • One piece of white cardstock
  • Embellishments - I used a piece of grey ribbon and grey craft paint that matched the paper I picked out for the bowtie.
Here's a close-up of the paper I picked out -
Homemade Wedding Card - scrapbook paper


Ok first, cut out the pieces of the template. 

Homemade Wedding Card - stencil pieces (4)

I wanted to have my dress strapless, so if you like the straps, keep the template the way it is and skip to the next step.

I'm a complete idiot when it comes to drawing, so I cut out the dress from the template, then lined it up over top of a white piece of copy paper to get my proportions right.  Then I cut the top of the dress off at the waist and drew a half heart-looking thing where the straps used to be. 

Homemade Wedding Card - Dress stencil to strapless

Homemade Wedding Card - New strapless dress stencil


If you made a new dress stencil, cut it out.  Now we're up to speed with the rest of the class. 

Line your stencil up on your fancy white paper, trace it and cut it out. 

Then grab the weirdly shaped stencil piece and trace it onto the FRONT of your black scrapbook paper.  If you line it up on the back like you were taught in elementary school, your whole flipping card will be backwards; and if you're clueless you won't notice until the end and then be too irritated to start it all over. 

Homemade Wedding Card - Black paper stencil tracing
Stupid tracing on the back of the paper...
  Cut out that piece and line up the dress to match up with the right side of the black piece like so -
Homemade Wedding Card - dress on black paper
If you did this right, your swoopy side will be on the right, NOT the left
If you have any excess where the black and white pieces don't line up (I did), cut it off.  Then, glue the dress to the black paper.

Homemade Wedding Card - dress on black paper excess removed

Next, trace the diamond-shaped stencil onto your white cardstock.  Cut out the white diamond piece and glue it to the black paper.  I glued mine maybe a half-inch higher than the top of the dress, but do what makes you happy. 

Homemade Wedding Card - shirt stencil added

Copy the bowtie stencil onto whatever paper you're using.  In my case, I traced it onto the grey paper I bought. 

Homemade Wedding Card - bowtie stencil

I put the tie on the diamond-shaped piece and thought it looked like it was missing something.

Homemade Wedding Card - bowtie piece on shirt close up

So I freehanded a little scrap to wrap around the middle of the bowtie. 

I don't know what a bowtie looks like in real life, I'm just guessing there would be a little piece that wraps around the middle.

Homemade Wedding Card - bowtie extra piece

Homemade Wedding Card - bowtie glued on
Much better!  What is that weird turd-looking thing on the dress??
Glue your bowtie on and then it's time for the best part - embellishments!!  Here is where you can get creative.  I added buttons to the shirt part, a belt around the waist of the dress and some dots along the bottom of the dress.  If you're adding ribbon, don't forget to burn the edges!

Homemade Wedding Card - burning ribbon

I thought it was still missing a little something, so I scrounged through my scrapbook paper stash and found some cute flowers on a scrap piece and cut those out.

Homemade Wedding Card - scrap flowers

Homemade Wedding Card - Flowers on Dress

When your "bride and groom" are properly embellished, all that's left is to glue them onto a card.  You can buy blank cards at just about any craft store, or make one out of your leftover white cardstock.  I'm impatient and didn't want to run out for a blank card, so I made one out of the leftover cardstock.

Homemade Wedding Card - All together

Right about here is where I realized the whole dang card is backwards.  But, even backwards it's pretty cute, especially since it took me probably 35 minutes from start to finish to complete.

Background Noise for this Project:  Buffy the Vampire Slayer (TV) - Season 1, Episode 4:  Teacher's Pet

Pin It